
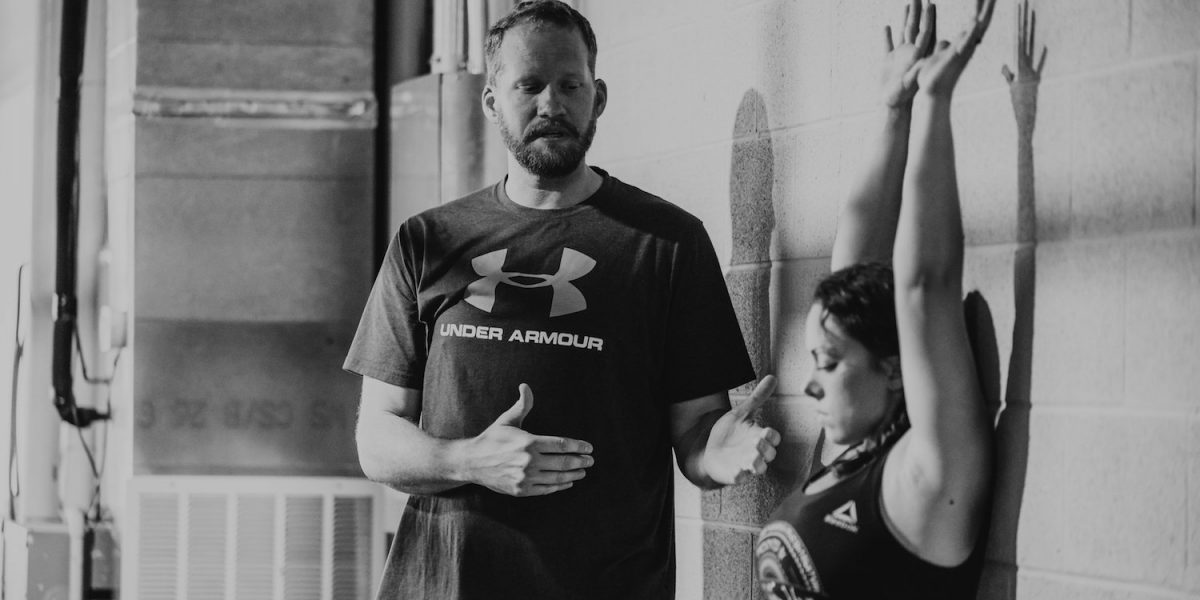
It’s 2018, and the functional fitness coaching community has come a long way in the last 15-20 years. Those that were in it to own a gym simply to have their own playground have been weeded out. Or, if they haven’t, it’s because they hired someone who knows how to coach. These days, a good coach isn’t just someone who knows how to man the time clock and shout “3, 2, 1…Go!” A good coach is someone who can analyze human movement, pick out the flaws, and perfect it.
But everyone has to start somewhere. Sure, some people truly have a knack for dissecting movements in real time. But, if you are like most people that own a small, independent gym, those people kind of amaze you. You know you envy the coach that can watch someone squat once and see that the left hip, right ankle, and left shoulder are causing all of their problems!
How did they do that?!?! Maybe you were a stay-at-home mom before you opened a gym. Now you’ve got people looking up to you as a fitness guru, and you feel like a sham. You don’t want to let them down! You want to help them be awesome!
Fortunately, analyzing body mechanics is a skill that you can grow and improve. But you have to start with a basic framework for isolating joints and muscles and learn to analyze them individually. Then you need to practice it. Again. And again. And again. This process for motion and mobility analysis needs to be easy to remember, quick to perform, and relevant to your athletes. This framework is found in an invaluable tool we’ve developed called a Functional Mobility Assessment.
What is a Movement Assessment?
A movement assessment is a predetermined set of exercises that test the athlete’s mobility and stability throughout their entire body in an organized and structured fashion. in a manner relevant to the core movements of functional fitness. This invaluable assessment pathway gives you a reliable, repeatable method to use when assessing athletes and clients. As you practice with it, you’ll begin to recognize abnormal movement patterns and learn which bodily limitations cause them.
Maybe you’re looking at a potential client or an athlete who’s struggling to perform an overhead squat. Maybe your athlete has been at your gym for years and hit a plateau, and you can’t seem to help them progress. Or maybe your athlete’s overhead press has looked “not quite right” for a year. Despite your best efforts at correction, they’ve injured their shoulder. Nothing looked drastically wrong. It just wasn’t perfect and you couldn’t pinpoint the problem.
This is where the functional mobility assessment comes in. In any of these situations, you want to instill confidence that you know what you’re doing and can help isolate their mobility struggles. You want to be “The Answer” for your clients and athletes. By using this screen for functional mobility you can determine exactly where the athlete is limited and then recommend targeted and actionable steps they can take to improve their form, stop their pain, and propel them to the next level!
What’s in the Mobility Test?
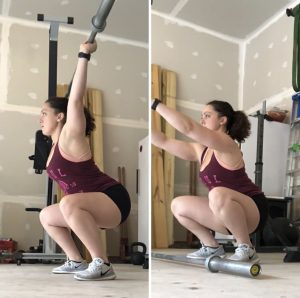
We decided to start our assessment with a high-skill movement which includes complex movement, requires good mobility, basic functional strength: The overhead squat. If you are assessing a new client or athlete, and they can adequately perform this exercise with good ROM and no pain, they are pretty much good to go! You can stop right there if you want and move them into your mainstream classes. They have adequate body control, motion and strength to join in with routine WODs and learn the more advanced techniques.
Notice, I said “adequate,” not perfect. Good movers may move well, but we can always chase perfection. It’s a good idea to regularly check in with all your athletes on the remaining parts of this functional fitness mobility assessment. It allows you to detect minor abnormalities before they become big problems. And it also allows you to identify issues that may be holding them back.
If the athlete fails the high-skill test, the next step is to check the Rang of Motion of the major joints from top to bottom. Not only does this help you remember all of the tests, but it creates a natural flow to the testing process. In our program, we check further with tests to isolate the shoulders, spine, hips, knees, and ankles and see if their range of motion is adequate.
We then assess the athlete’s strength and control at primary muscle groups. This is performed with just a couple basic exercises including the air squat, pole squat, and single leg step down. When you combine their ability to perform these movements along with their range of motion at major joints, you can get a very precise and accurate assessment of their functional movement deficits.
How to Score a Mobility Screen
Pass
There are three important categories when scoring a mobility screen. The first is a passing score. This means the athlete was able to perform the movement required with full ROM and adequate technique.
So the first step in determining a passing movement during this assessment is learning what qualifies as adequate form. Let’s take an air squat. In order to pass, an athlete must squat with their hips below “parallel.” This means that the hips have to sink lower than their knees. The knees stayed above or lateral to the foot, without any inward collapse. Their chest remained upright through the entire movement. Importantly, and often un-noticed by many coaches, their heels stayed on the ground the whole time.
Great! This athlete appears to have adequate ROM in their hips, knees, and ankles to perform the basic air squat. They also seem possesses the muscular strength and control to keep themselves stable throughout the entire movement. They are safe to start training most lower body exercises. And if they were unable to perform an overhead squat, you have identified that their shoulders and upper back are the most likely sources of limitation.
Fail
Say a different potential client attempts an air squat and can get their hips below parallel, but only if they come up in their toes on the way down. First, give them one or two cues to help the client understand the standards of movement you’re asking of them. “Heels down.” “Sit back.”
Consider this a passing grade if they’re able to perform the movement with a few brief tips. However, if they still cannot perform the movement to your standards, this is considered a failing grade. Remember, you have several movements to check in an assessment. It’s easy to get caught up in teaching a test, and suddenly 10 minutes have flown by.
Make sure the athlete understands the standards expected of them, give them a chance to complete the task, and move on. Don’t try and fix true deficits, only check to be sure the client properly understands what you are asking them to do.
Pain
If the client has pain at any time during the test, even if they can complete the movement with full ROM, this is considered a failing grade. It’s important to differentiate pain from discomfort. Minor soreness or discomfort at end ROM is important to note in your athletes, but not necessarily an indicator that they cannot perform this movement at all. Sharp stabbing pain in the middle of a movement which causes a visible grimace or wincing, or pain that the client rates as moderate to severe is something to take seriously.
Why Should I Use a Functional Mobility Assessment on My Clients?
Adequately assessing a new member is a key to ensuring that they have a successful and injury-free start in your gym. The first few weeks of starting a functional fitness routine are one of the times people are at the highest risk for injury. You want these folks to workout, get healthy, and tell their friends how awesome you are! Not tear their meniscus and tell everyone to stay away from you.
Mobility assessments are also important to identify where an established athlete is lacking flexibility and functional strength. It is impossible for an athlete to have good technique if they do not possess the requisite mobility for that movement. As coaches, we’ve all seen the athlete who has the strangest kipping form you’ve ever seen but still manages to make it work. You’d like to fix them before they hurt their shoulder but you don’t know what the problem is. By performing a movement assessment, you can determine if their shoulders, spine, hips are limiting their ability to do this exercise before they injure themselves.
In the high-functioning athlete, a proper movement assessment can help propel them to the next level of fitness. Poor movement mechanics may not always end up in injury. Some people are just lucky that way. But poor movement patterns almost always equal inefficient movement. These athletes may crush their metcon times or continue increasing weight on all major lifts for a year or so. But eventually, their technique will limit their Olympic lifts or their metcon times. These athletes can get frustrated when their progress grinds to a halt and may start looking at other gyms if you can’t connect the missing mobility link.
Our functional movement assessment allows you to establish a baseline for each client. Then you know exactly where they need to improve before they can master (or even attempt) a new skill safely. No more guesswork.
Implementing a Mobility Screen in Your Gym
One-on-One
The easiest time to perform a functional mobility assessment is during a new client consultation. This gives you 10 minutes, one-on-one, to take a potential client through the screen to establish a functional baseline. The information is more for you benefit than theirs at this time. If they commit to joining your gym, you now have a heads up for how they move and how you may or may not need to scale before they hop in their first class. It also establishes you as a gym owner that cares about them and demonstrates you expertise from the very beginning.
In Class
If you’ve never done a mobility assessment on your existing members, it’s not too late! You can still implement this concept in a class setting, but attempting the full assessment with 10 or more people in a class can quickly eat up your entire hour. To compromise for a group setting, try choosing one test that applies to the body part you’re using in the workout, and add the brief screen to your warm-up. You can use this brief, two-minute assessment once a month or even once a week to check base with all of your clients.
A client’s ability to pass the mobility screen can change on a day-to-day basis. Someone who recently irritated a lumbar disc may suddenly be unable to pull a weight from the floor. Or a client who’s got a severe case of the DOMS may be temporarily unable to lift their arms overhead. Sometimes your clients may communicate these things with you. Other times, they may be stubborn, and you need this opportunity to be able to educate your athletes on why we scale workouts and choose appropriate substitutions.
Choose a Functional Mobility Assessment That’s Right for You
Coaches with years of experience may have developed their own assessment through trial and error. I’ve said before – assessing body mechanics is a learned skill. It can be difficult to know where to start. There are a few existing mobility screens that focus on assessing risk injury for team sports. Unfortunately, these don’t assess one’s capacity for starting a functional exercise program. They may give you the likelihood of injury in a football player. But they won’t tell you why your client can’t snatch.
We’ve been working to develop a functional mobility assessment that focuses on the essentials of human movement. We choose functional fitness due to its overall simplicity and effectiveness. Your mobility assessment should be the same. By recognizing your athlete’s mobility limitations, you can help them avoid injuries and make faster progress on their technique. Sign up for our mailing list to be the first to know when the program is available! We’ll email you the link to our FREE MOBILITY ASSESSMENT PDF as soon as its available!